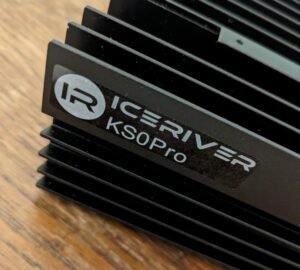
Upgrade: The IceRiver KS0 Pro from millionminer gets a new PSU, heatsinks and a new fan.
I received an IceRiver KS0 Pro Miner from millionminer a few weeks ago and am very happy with the device, just like its predecessor.
My old KS0 has a 12V 120mm fan which is only supplied with 5V via a USB charger. Therefore the fan automatically turns slower. I have set the internal fans to 50% power. This gives me a relatively cool KS0 which is also extremely quiet.
My new KS0 Pro, on the other hand, seems to produce a little more waste heat. The power supply unit (PSU) was also always very warm. I therefore thought about how I could still get something out of it with little effort. As a result, I bought a new PSU with an output of 150 watts instead of 120 watts.
Of course, it is important that the power supply has the same connection (5.5×2.5mm) and the same output voltage (19V). The higher performance of the power supply can then be seen from the amperes (A) or the power in watts.
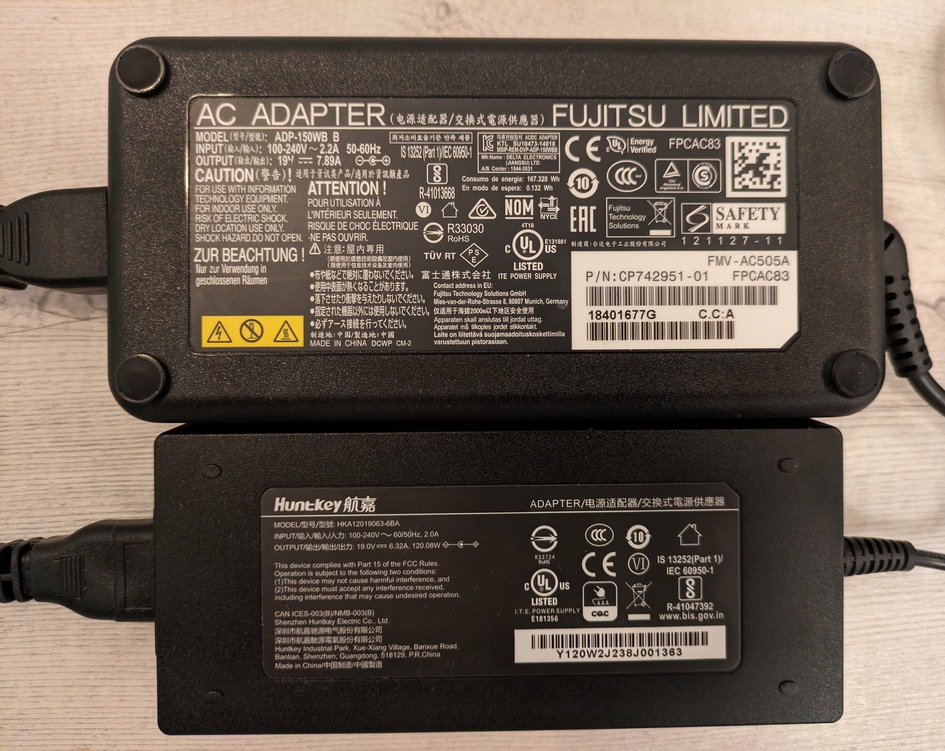

Note: There are also power supply units for the KS0 Pro with 20V. However, I would advise you to use a 19V power supply, as the lower original voltage will protect the sensitive components.
The new power supply is in any case somewhat larger, heavier and of course cooler than the old power supply supplied. Personally, I prefer to use a stronger and cooler power supply in my home environment to counteract any problems with heat development in the home.
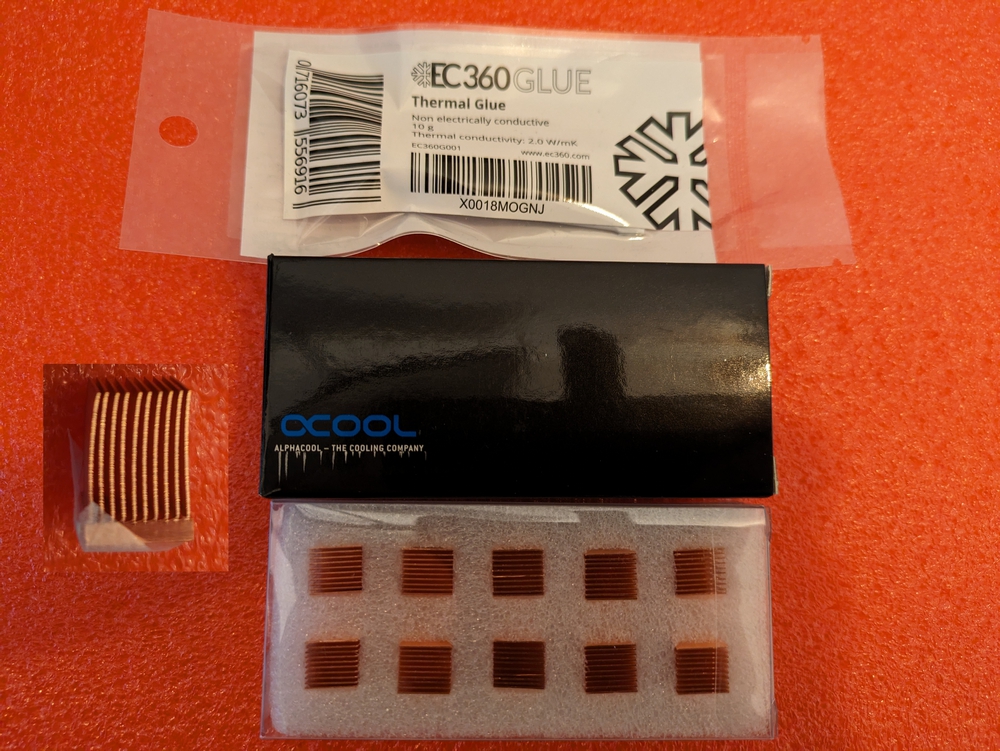
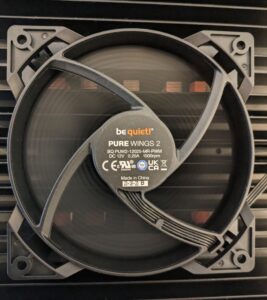
I also bought some thermally conductive adhesive, some heatsinks and of course my 120mm beQuiet fan. I use an adapter cable for my fan so that I can power the fan via a 5V USB power supply. Some 12V fans may not start with 5V. However, the fans I have tested so far have all started with 5V. The slower speed is desired by me. If you want 12V, you can increase the voltage on the USB port from 5V to 12V with this small device (please only connect 1 fan).

To glue the heatsinks, I only applied a small amount of heat-conducting adhesive.
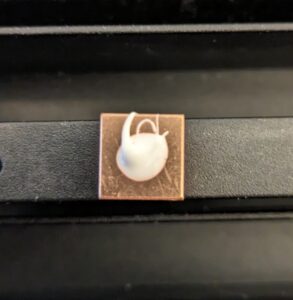

Then I glued the heatsinks to the case. When gluing the heatsinks, you need to apply a little pressure so that the heatsinks adhere properly and the adhesive spreads well due to the pressure.
Afterwards, my KS0 Pro looked like this:
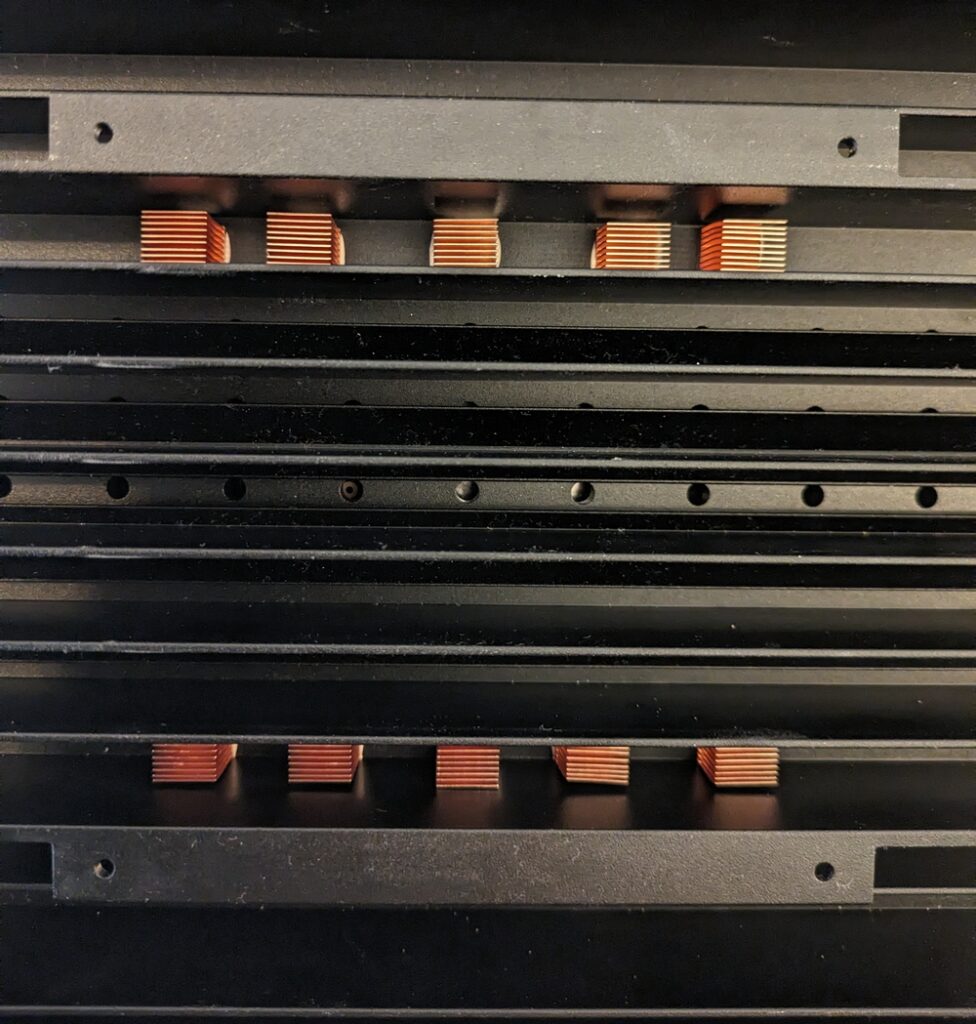

Next time I would try to get slightly higher heatsinks. The actual plan is for the fan to extract the air through the cooling groove and then through the grooves of the heatsinks to the outside.

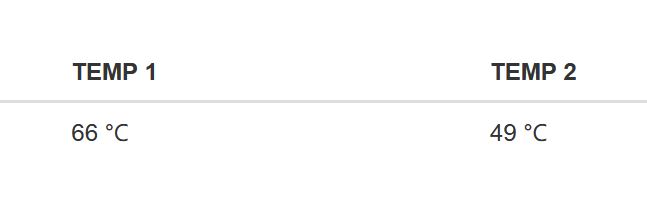
The temperature before the heatsinks:

The temperature after the heat sinks:
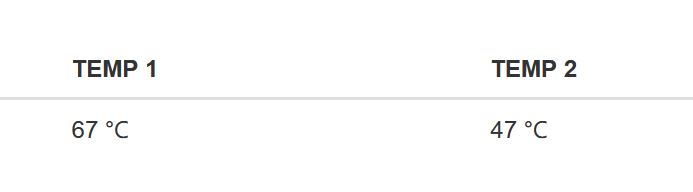

If we only look at the temperature from the result, it doesn’t do us much good. Without the heatsinks and without the fan, the internal fans of the KS0 Pro automatically start to turn more than (the set) 50%. This makes the KS0 loud – which of course I don’t want.
So I’m relatively happy with the result, but a 120mm fan would probably have done the trick 😉 With a bit of luck, my heatsinks will save me from fans that are too loud in the summer.